Customizing reusable packaging can feel simple, but a good result needs planning. This guide explores How to customize non woven bags at home using affordable tools, clear design choices, and safer working habits. You can begin with a plain polypropylene bag, a pencil, fabric-safe paint, stencils, masking tape, and a small test piece. The bag should be clean and dry. Its surface may resist ordinary paint, so testing first is essential.
William McDonough, a leading circular-design advocate, said, “Waste equals food.” This idea suits reusable bag projects. A thoughtful design should encourage repeated use, not create another short-lived decoration. Choose a washable pattern, strong handles, and colors that remain readable after daily handling. Simple shapes often work better than crowded artwork. A leaf, local skyline, or short message can look clear from several steps away. Keep ventilation in mind, especially when using spray products or heat tools. Follow each product label carefully. Do not assume every ink is safe.
Real home projects are rarely perfect. Paint may bleed under the stencil. The first bag may look uneven. That is useful feedback, not failure. Measure the logo area before painting, and allow enough drying time between layers. You can also compare hand painting, fabric markers, and iron-on designs before choosing one method. Avoid exaggerated environmental claims unless the material and manufacturing details support them. A customized bag becomes more valuable when it is practical, durable, and honestly described. This 2026-focused guide will help you improve the process while leaving room for personal style and better judgment.
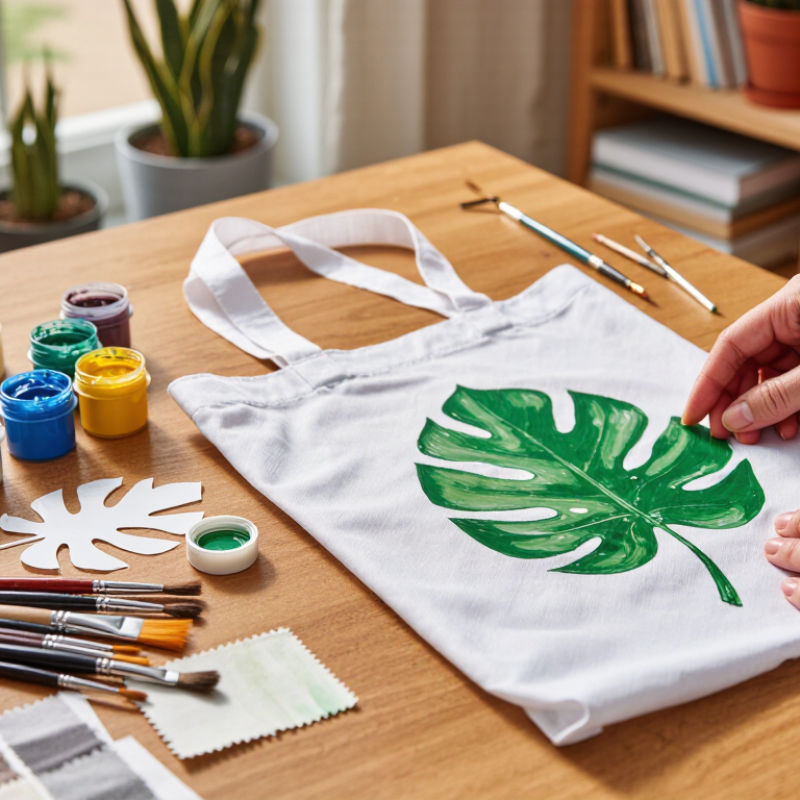
2026 Best Ways to Customize Non Woven Bags at Home?
Choose 80–120 GSM PP nonwoven fabric and verify its mass using ISO 9073-1 principles. GSM means grams per square metre. A 100 GSM sample should weigh about 10 grams when cut to 0.1 square metres. Use a ruler, sharp scissors, and a digital kitchen scale.
This range balances flexibility and strength for home projects. Around 80 GSM feels light and folds easily. Near 120 GSM gives firmer handles and better shape retention. My practical preference is 100 GSM for grocery bags, gift bags, and simple heat-free decoration. Still, fabric weight alone does not prove durability. Stitch quality matters.
A 2024 Grand View Research analysis estimated the global nonwoven fabric market at about USD 53.5 billion in 2023. It also projected growth of roughly 7.2% annually through 2030. That expansion reflects demand for lightweight, reusable, and cost-efficient materials. However, market data does not guarantee every fabric performs equally at home.
For a reliable check, weigh three samples from different areas. Record the results. Small variations may reveal uneven production. ISO 9073-1 testing requires controlled procedures, so a household measurement is only a screening method. I once trusted the label too quickly; the bag looked sturdy but stretched at the handles. Leave extra fabric there. Test before decorating.
| Data Dimension | Recommended Value or Range | Why It Matters | Home Customization Guidance | Verification or Safety Note |
|---|---|---|---|---|
| Primary fabric type | PP spunbond nonwoven | Polypropylene spunbond fabric is lightweight, sewable, and commonly used for reusable promotional and shopping bags. | Choose a smooth, evenly bonded sheet with no visible holes, brittle areas, or strong chemical odor. | Confirm the material composition with the supplier or product specification before cutting. |
| Target fabric mass | 80–120 g/m² | This range provides a practical balance between flexibility, weight, handle strength, and ease of cutting at home. | Use 80–90 g/m² for lightweight tote bags and 100–120 g/m² for a more structured bag or heavier contents. | Measure mass per unit area according to ISO 9073-1 when laboratory or quality-control verification is required. |
| Recommended mass check | Cut a known-area sample, weigh it, and calculate: GSM = mass in grams ÷ area in square metres | A simple calculation helps identify whether the material is close to the specified GSM. | For a 10 cm × 10 cm sample, multiply the sample weight in grams by 100 to estimate g/m². | Use a calibrated scale and avoid including labels, tape, or other materials in the sample weight. |
| Best beginner decoration method | Water-based fabric paint with a stencil | Stencils provide clean, repeatable shapes and require limited equipment. | Place cardboard inside the bag, secure the stencil with low-tack tape, apply thin paint layers, and allow full drying. | Test first on a scrap piece because paint adhesion varies with surface finish and paint formulation. |
| Hand-drawn customization | Opaque fabric markers or paint pens | Markers are suitable for names, simple illustrations, and small lettering. | Use short strokes with light pressure to reduce ink spreading and keep the fabric supported on a flat surface. | Choose products labeled for fabric use; ordinary water-based markers may fade or wash out. |
| Heat-transfer decoration | Use only low-temperature, compatible transfer materials | PP softens and can deform when exposed to excessive heat, so temperature control is important. | Follow the transfer-material instructions, use a protective sheet, apply the lowest effective temperature, and keep contact time short. | Always perform a test on a fabric offcut. Do not place a hot iron directly on exposed PP nonwoven fabric. |
| Simple printing option | Small stencil or screen print with a flexible fabric-compatible ink | Printing gives sharper repeated graphics than freehand drawing. | Use a light, even ink layer and allow the printed surface to dry completely before folding or sewing. | Check the ink instructions for polypropylene compatibility and wash or rub resistance. |
| Bag construction | Folded seams with straight stitching | Folded seams distribute stress better than a single raw-edge seam. | Use a 10–15 mm seam allowance, stitch slowly, and reinforce the top edge and handle attachment points. | Inspect the seam after loading; excessive needle perforation can weaken lightweight fabric. |
| Handle design | Two fabric handles with reinforced attachment areas | Handles carry concentrated loads and are usually the most highly stressed part of the bag. | Extend each handle end several centimetres down the inside or outside panel and sew a rectangular or box-X reinforcement. | Test with a gradually increasing load rather than dropping a heavy object into the bag. |
| Suggested home bag size | Approx. 35 × 40 cm body with a 10–12 cm bottom gusset | This size is practical for groceries, books, and everyday items while remaining manageable to sew. | Adjust the dimensions to the intended contents and add seam allowances before cutting. | Finished capacity depends on fabric GSM, seam construction, handle reinforcement, and load distribution. |
| Cutting tools | Sharp fabric scissors or a rotary cutter with a cutting mat | Clean cutting reduces jagged edges and helps panels align accurately. | Use a ruler and removable fabric marker to mark straight lines before cutting. | Protect the work surface and keep cutting tools away from children. |
| Drying and curing | Air-dry flat until the decoration is fully cured | Complete drying improves rub resistance and reduces transfer of uncured color. | Keep the decorated panel flat and dust-free; follow the paint or ink manufacturer’s curing time. | Do not fold or pack the bag while the printed surface remains tacky. |
| Cleaning recommendation | Spot clean with mild soap and cool or lukewarm water | Gentle cleaning helps preserve the nonwoven structure and surface decoration. | Blot rather than scrub, rinse lightly, and air-dry away from direct high heat. | Cleaning performance depends on the decoration system; test colorfastness on an inconspicuous area. |
| Quality checks before use | Seam inspection, handle pull check, print rub check, and visual fabric inspection | These checks help identify weak attachment points, loose stitches, poor adhesion, or damaged fabric. | Examine both sides of every seam and apply a moderate hand load before regular use. | A home inspection is not a substitute for a formal load, seam-strength, or durability test. |
| Environmental handling | Reuse repeatedly; follow local plastic recycling guidance when the bag reaches end of life | Longer service life generally reduces the need for replacement bags. | Repair loose handles or seams early to extend usable life. | Paints, coatings, mixed fibers, and accessories may affect recyclability; check local requirements. |
Measure the length, height, base, and gusset separately. Record every measurement twice. Measure twice. Keep the material flat on a clean table. Do not pull it, because the fabric can shift slightly.
Add a 10–15 mm seam margin around every panel. Mark the cutting line separately from the stitching line. Leave extra room near corners and joined seams. I have sometimes cut too quickly. Those missing millimeters can matter.
Make a paper template before cutting the material. Test it on folded fabric. Check handle positions, pockets, and printed areas. A paper mistake is easier to repair. The template may still need adjustment.
Use a ruler, chalk pencil, and sharp fabric scissors. Keep the table clean and the fabric smooth. Clip curves carefully instead of cutting deeply. A simple test seam can show whether the margin works.
A 90–120 mesh screen suits flat, lightly textured non woven bags. Use 90 mesh for heavier ink coverage. Choose 120 mesh for finer lettering. Keep designs bold and simple. Very small details may disappear.
One to four colors are manageable for basic home printing. Add registration marks for each layer. Let one color dry before adding another. Secure the bag with removable tape. My early prints looked uneven because the fabric moved.
Test the artwork on a scrap bag first. Keep the screen clean and avoid excessive ink. Cure the print according to the ink supplier’s instructions. Check wash resistance after curing, not immediately. A gentle hand-wash test can reveal weak adhesion.
Begin near 130°C for 10 seconds. Suitable settings generally range from 130–160°C for 10–20 seconds. Use light to medium pressure. Place a heat-resistant release sheet over the transfer. Let it cool flat. Do not slide the press.
Stop if the fabric feels stiff, warped, or unusually glossy. Reduce heat before trying again. Add a few seconds rather than raising temperature immediately. Check the corners after cooling. The result may not be perfect, but it provides useful feedback.
How to customize non woven bags at home begins with choosing suitable 80–120 GSM polypropylene nonwoven fabric and checking its basic structure according to ISO 9073-1. Measure the front, back, side, and bottom panels carefully, then add a 10–15 mm seam allowance before cutting. Accurate templates help create balanced bags and reduce material waste.
For decoration, prepare simple 1–4 color artwork and use a 90–120 mesh screen for clear, even printing. When applying heat, work with polypropylene-safe settings of approximately 130–160°C for 10–20 seconds, testing a small area first to avoid distortion or scorching. After assembly, inspect at least 50 bags, checking seam strength, handle attachment, print clarity, dimensions, and overall appearance. Using an AQL 2.5 quality reference can help organize the final inspection and maintain consistent results across the finished batch.

 LAHD Bag